
Introduction to Canva and Background Removal
Canva has rapidly become one of the most popular tools for graphic design, known for its user-friendly interface and a vast array of features that cater to both beginners and professionals. Whether you are creating social media graphics, presentations, posters, or other visual content, Canva offers a comprehensive suite of tools to help you achieve your design goals efficiently. Among its many features, Canva’s background removal tool stands out as particularly useful for photo editing and enhancing visual appeal.
Background removal is a critical function in photo editing, as it allows users to isolate the main subject of an image from its background. This technique is commonly used for creating cleaner, more professional-looking visuals, whether for marketing materials, e-commerce product photos, or personal projects. By removing the background, you can seamlessly integrate subjects into different contexts, change backgrounds, or apply various design effects to make your images more compelling.
One of the prerequisites for using Canva’s background removal tool is a Canva Pro subscription. While Canva offers a free version with numerous features, the background remover is part of the premium suite available to Pro users. This subscription unlocks additional functionalities, including access to an extensive library of templates, images, and design elements, as well as advanced editing tools like the background remover.
With Canva Pro, users can effortlessly remove backgrounds with just a few clicks, thanks to the platform’s intuitive design and powerful algorithms. This ease of use makes it accessible to those who may not have extensive experience with graphic design software. As we delve into the step-by-step instructions for background removal, you’ll see how straightforward it is to enhance your images using Canva’s capabilities.
Uploading Your Image to Canva
To begin the process of removing the background from a picture using Canva, the first step is to upload your image. Start by creating a Canva account if you don’t already have one. This can be done by visiting the Canva website and selecting the sign-up option. You can use your email, Google, or Facebook account to register. If you already have an account, simply log in with your credentials.
Once you are logged in, you will be directed to the Canva dashboard. This is the central hub where you can access all of Canva’s tools and features. On the dashboard, you will see a variety of design templates for different types of projects, such as social media posts, presentations, and more. To upload your image, you first need to select the type of design project you are working on. For instance, if you are creating a social media post, click on the corresponding template.
After selecting your project type, you will be taken to the Canva editor. Here, you will see the different elements you can add to your design on the left-hand side of the screen. To upload your image, look for the ‘Uploads’ tab on the left panel. Click on it to open the upload options.
Next, click the ‘Upload Media’ button. This will open a dialog box where you can choose the image file from your computer or device. Navigate to the location where your image is stored, select the file, and click ‘Open.’ Your image will begin uploading to Canva, and you will see a thumbnail of it appear under the ‘Uploads’ tab.
Once your image is uploaded, you can click on the thumbnail to add it to your design workspace. Now that your image is in Canva, you are ready to proceed to the next step of removing the background.
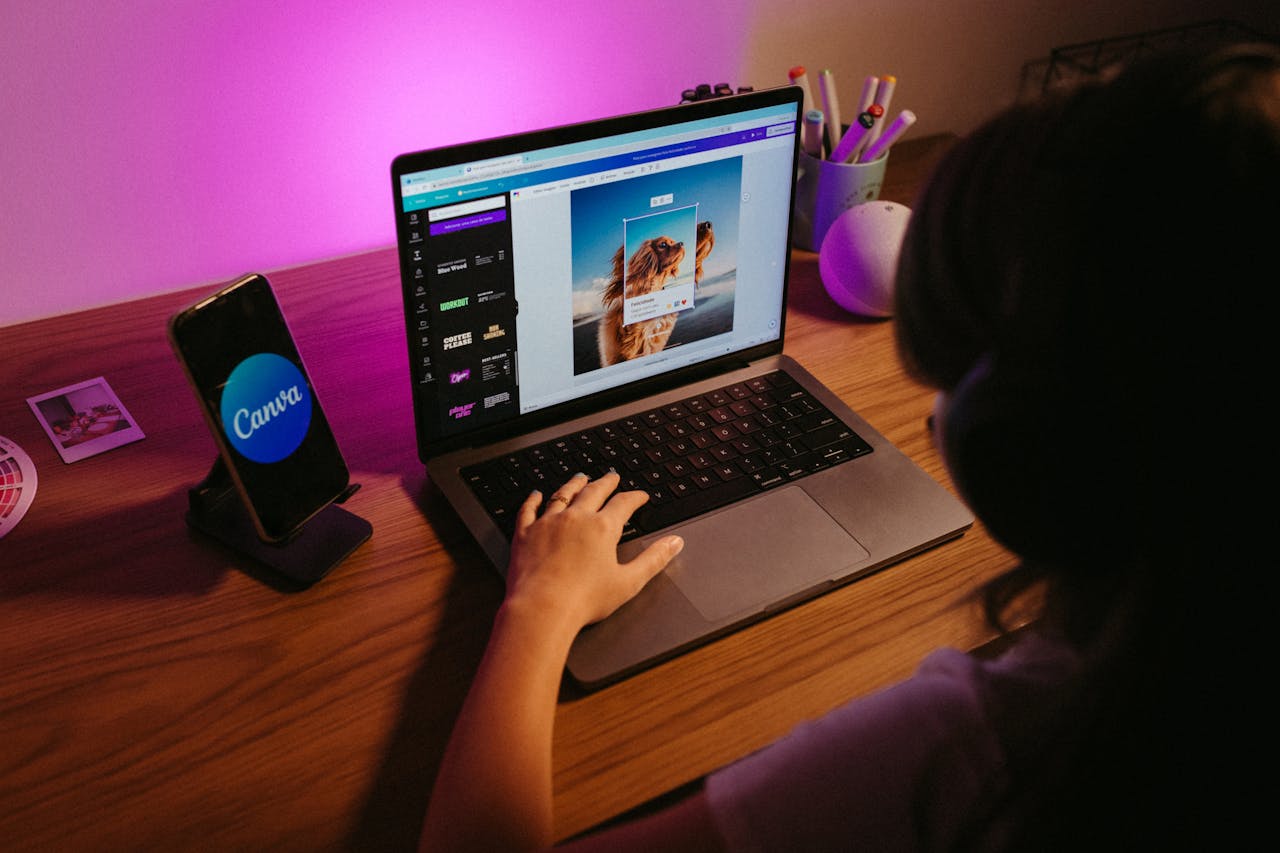
Using the Background Remover Tool
To effectively use Canva’s Background Remover tool, start by uploading your desired image to the Canva canvas. Once the image is placed on the canvas, click on it to select it. This action will reveal a toolbar above the canvas. Look for the ‘Effects’ button in this toolbar and click on it to access various image editing options.
Within the ‘Effects’ panel, you’ll find an option labeled ‘Background Remover’. Click on this, and Canva will automatically start processing the image to remove the background. This may take a few moments, depending on the complexity and size of the image.
After the automatic background removal is complete, review the result. Canva typically does an excellent job, but sometimes manual adjustments may be necessary to perfect the image. If you notice any remnants of the background or areas that need refinement, use the ‘Erase’ and ‘Restore’ tools located in the same ‘Effects’ panel. The ‘Erase’ tool allows you to remove additional parts of the background, while the ‘Restore’ tool helps to bring back any parts of the image that might have been mistakenly removed.
Throughout this process, it’s helpful to zoom in on different parts of the image to ensure precision. Canva provides easy-to-use zoom controls for this purpose. Once you are satisfied with the background removal, click on the ‘Done’ button to finalize your changes. Save your edited image by clicking on the ‘Download’ button at the top right corner of the screen and choosing your preferred file format.
By following these steps, you can efficiently use Canva’s Background Remover tool to create clean, professional-looking images with transparent backgrounds. This tool is especially useful for creating graphics, marketing materials, and presentations that require high-quality visuals.
Finalizing and Saving Your Edited Image
Once you have successfully removed the background from your picture using Canva, the next crucial step is to review your edited image for any imperfections. Carefully examine the edges and ensure that the subject stands out clearly from the background. If you notice any areas that need refinement, use Canva’s eraser or restore tool to make precise adjustments.
In addition to removing the background, Canva offers a variety of effects and elements that can further enhance your image. You can apply filters to adjust the color balance, contrast, and brightness, or add text and graphics to make your image more engaging. Explore the “Effects” and “Elements” tabs on the left-hand side of the Canva interface to find suitable enhancements for your project.
After reviewing and finalizing your edits, it’s time to save your image. Canva provides several download options to meet different needs. Click on the “Download” button located at the top right corner of the screen. You will be presented with a dropdown menu where you can select the desired file format. Common options include PNG, JPEG, and PDF. For images with transparent backgrounds, PNG is the preferred format due to its support for transparency.
When downloading, you can also choose the image quality. Canva typically offers standard and high-resolution options. For most online uses, standard resolution is sufficient, but if you plan to print the image or use it in a high-quality publication, opt for the high-resolution download to maintain clarity and detail.
By following these steps, you can ensure that your edited image is polished and ready for use. The combination of Canva’s intuitive editing tools and flexible download options makes it easy to create professional-quality visuals for any purpose.